Installing external wall insulation can be a challenging yet rewarding process. It is a crucial step towards ensuring your home is protected from the elements while also reducing energy bills and creating a more comfortable living environment. Here’s a how external wall insulation is installed.
The first step in the process is the preparation of the external walls. This involves removing any loose or damaged rendering or brickwork, and cleaning the surface thoroughly to ensure the insulation can be applied correctly. Watching as the worn and tired exterior is stripped away can feel both exciting and unnerving, as the skeleton of your home is exposed for all to see.
Once the walls have been prepared, the insulation material is applied using adhesive and mechanical fixings. As the insulation boards are attached to the walls, a sense of satisfaction and security starts to set in. The knowledge that your home is being strengthened against the harsh weather conditions, and will be better protected for years to come, can bring a wave of relief and comfort.
After the insulation boards are securely fixed in place, the next step is to apply a base coat and reinforcing mesh. This is where the real transformation begins, as the rough and uneven walls start to take on a sleek and polished appearance. The mesh is meticulously attached to the insulation, smoothing over any bumps or rough patches in the wall. The sensation of watching the transformation of your home’s exterior can be exhilarating, as you witness the metamorphosis from a worn-out appearance to a brand-new façade.
Once the base coat and reinforcing mesh have been applied, the final stage is to add the finishing coat. This is the stage where the real beauty of external wall insulation shines through. The choice of finish is entirely up to you, and the options are endless, ranging from textured to smooth, and from coloured to natural. The feeling of personalisation and control that comes with choosing the final finish for your home is empowering and gratifying.
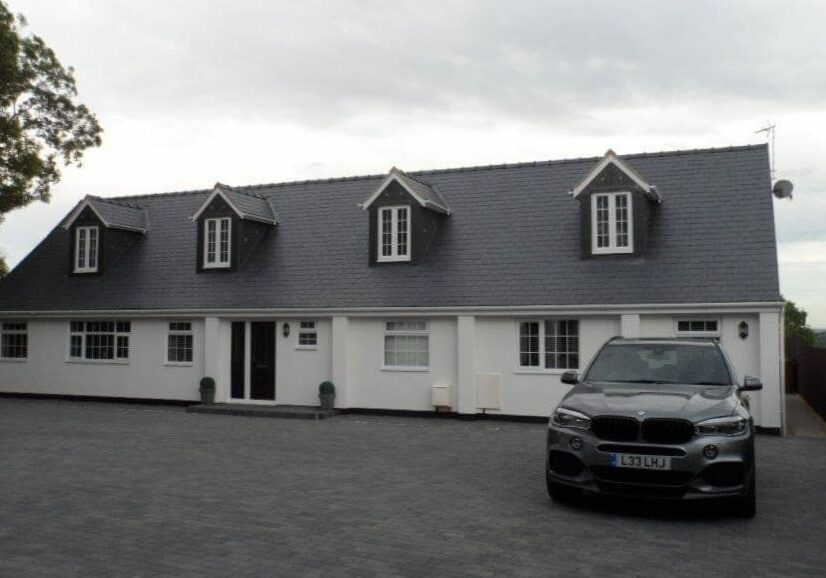
The final result of external wall insulation is a house that looks beautiful and feels warmer and more comfortable. It’s an emotional experience to see your home’s new façade for the first time, and it’s hard not to feel a sense of pride and joy at the sight of it. The knowledge that your home is now more energy-efficient, saving you money on bills and reducing your carbon footprint, can be a rewarding feeling, adding to the overall sense of satisfaction.
In conclusion, installing external wall insulation is a complex process that requires expertise and care. However, the emotional journey of watching your home’s exterior transform before your eyes can be an exhilarating and satisfying experience. From the stripping away of the old façade to the application of the finishing coat, every step of the process brings a sense of renewal, security, and pride.
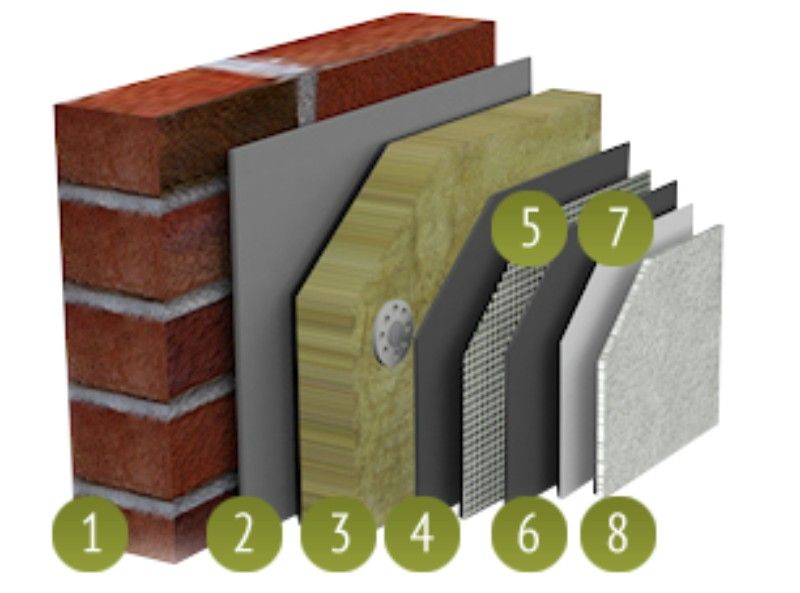
The below image shows the pictorial view of how External Wall Insulation is installed.
- Original wall structure
- Adhesive
- Insulation
- Basecoat
- Mesh
- Basecoat
- Primer
- Top Coat